E-Drill Maintenance

Delve into our comprehensive curriculum on E-Drill Maintenance. For the full E-Drill Training, Maintenance and Troubleshooting catalog, visit the full E-Drill Academy Page.
Filter E-Drill Academy Videos
All E-Drill Academy Posts
    All E-Drill Academy Posts
    The DI water system requires periodic filling or “Top-Off” to replace tiny amounts of DI water lost during the cutting cycle. Should the system run low on water during operation, the Hand Tool will indicate a flashing red light and the display will indicate a “Low Water Level” condition. To “Top-off”, fill an open container…

    System “Top Off”

    E-Drill 2.0
    The DI water system requires periodic filling or “Top-Off” to replace tiny amounts of DI water lost ...
    Please follow this checklist to maximize the performance and reliability of your E-Drill System. The last section of this chapter shows typical damage which might be encountered.   1.1. General Replace any cracked or frayed cables. Tighten any loose connections. Check for leaks. Replace any cracked components. 1.2. Hand Tools Center Ground (CG) Mode –…

    E-Drill 2.0 Daily Checklist

    E-Drill 2.0
    Please follow this checklist to maximize the performance and reliability of your E-Drill System....
    System maintenance and connecting/disconnecting system components can cause air to become entrapped in the DI water system. Bleeding and charging are sometimes required to assure there is no trapped air in the DI system. Enter maintenance mode from the system menu on the Touch-Screen Display and complete the Top-Off procedure to assure the system is…

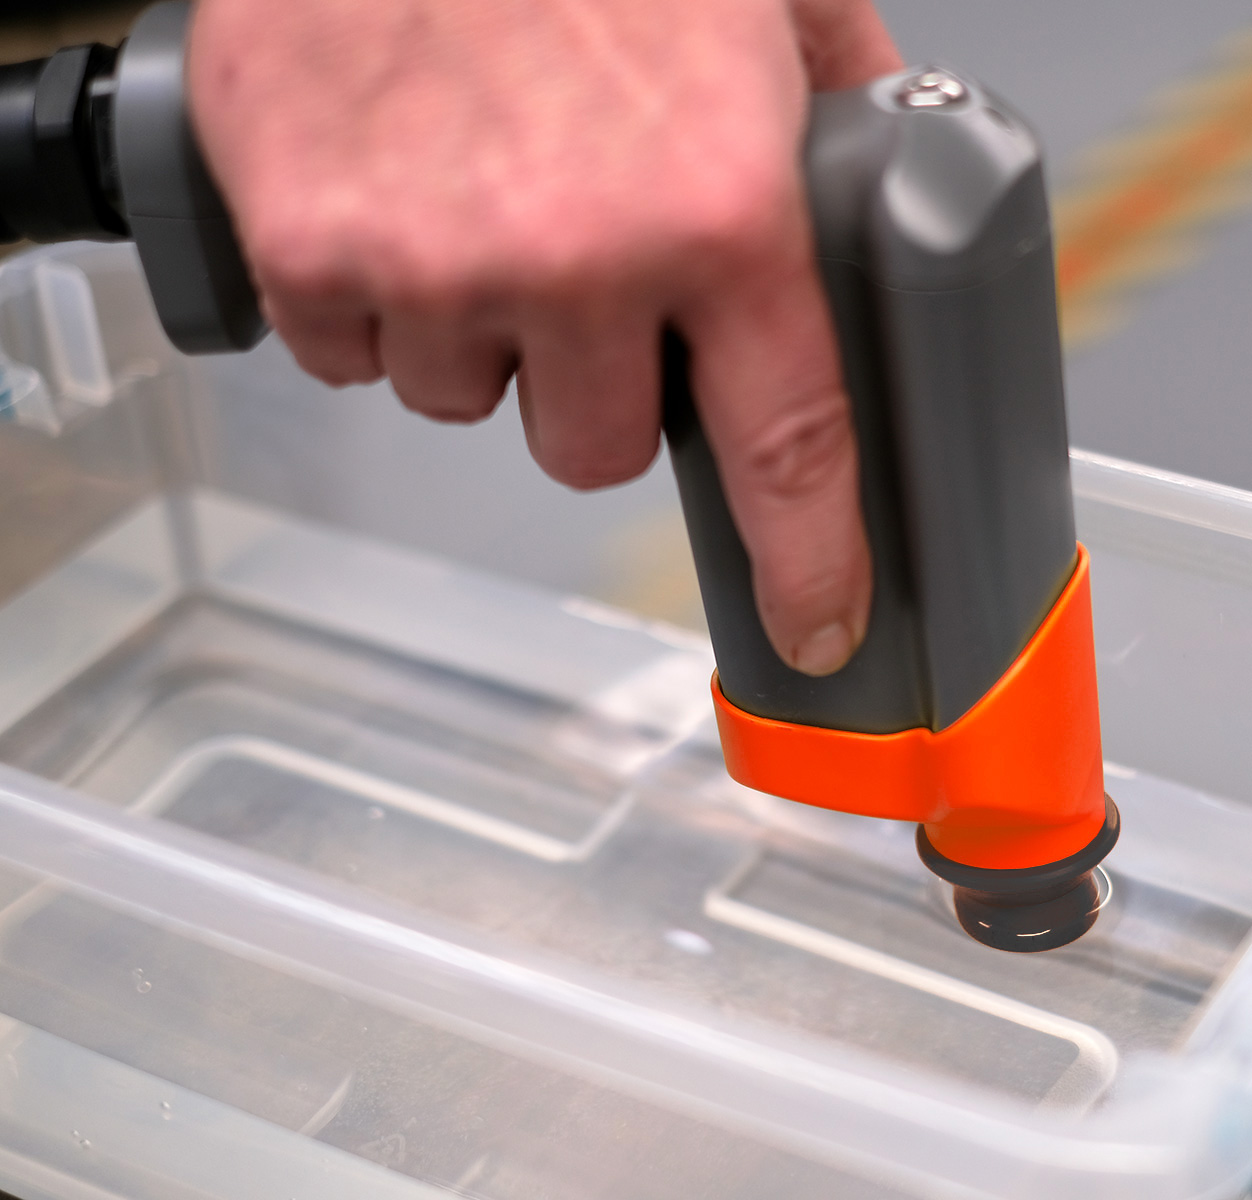
    System Bleeding and Charging Procedure

    E-Drill 2.0
    Bleeding and charging are sometimes required to assure there is no trapped air in the DI system....
    Ground Pin Installation is a critical parameter in efficient operation of the device (much like the electrode in a TIG welder). As described in the Weekly Maintenance Schedule, the Ground Pin should be checked regularly for excessive burning or damage and correct protrusion from the front of the E-Drill. The procedure for checking and adjusting,…

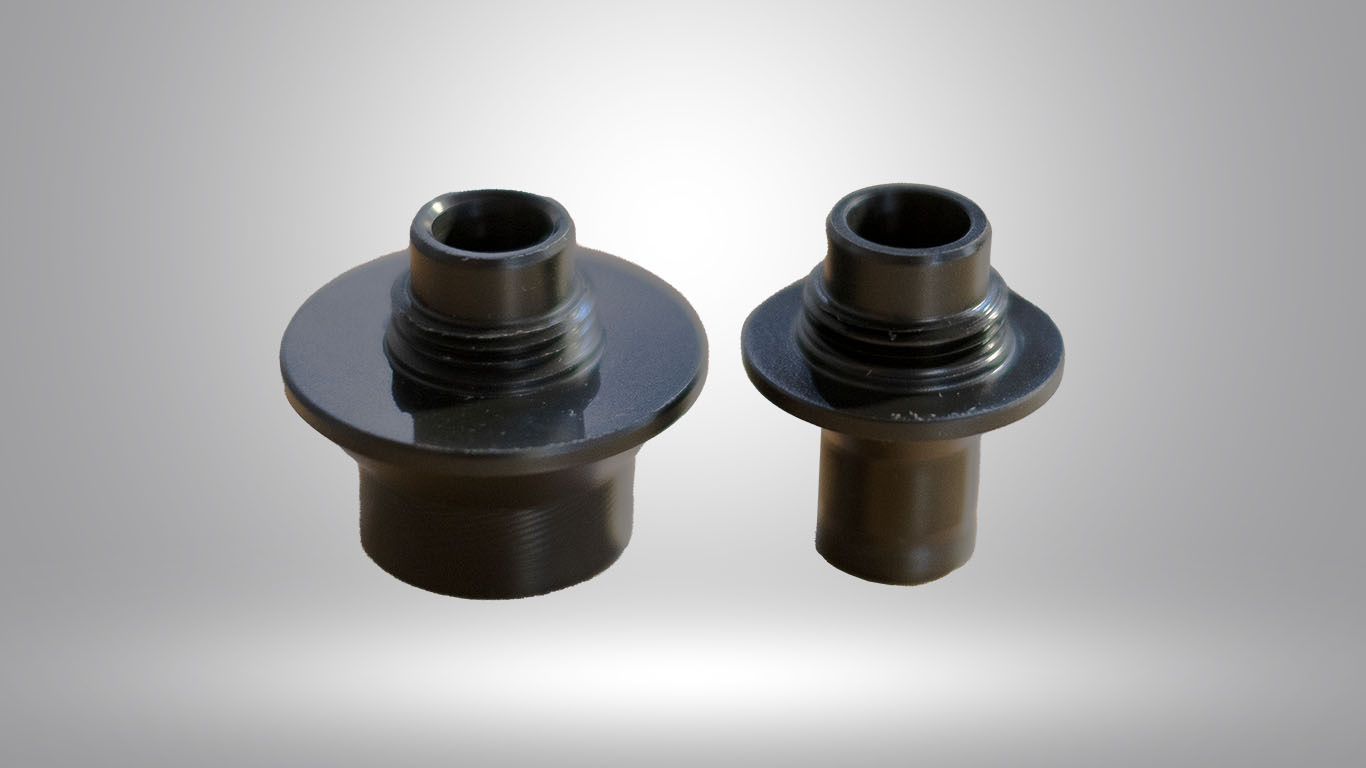
    Ground Pin Replacement

    E-Drill 2.0
    Ground Pin should be checked regularly for excessive burning or damage and correct protrusion from t...
    The system is provided with Vacuum and Pressure gauges to check the performance of the Dielectric water system. Vacuum and pressure may be checked in Advanced Mode (see Appendix 1) or from the maintenance screen (see Section 3.4). It is suggested that this check be carried out monthly or when inferior performance is suspected, per…

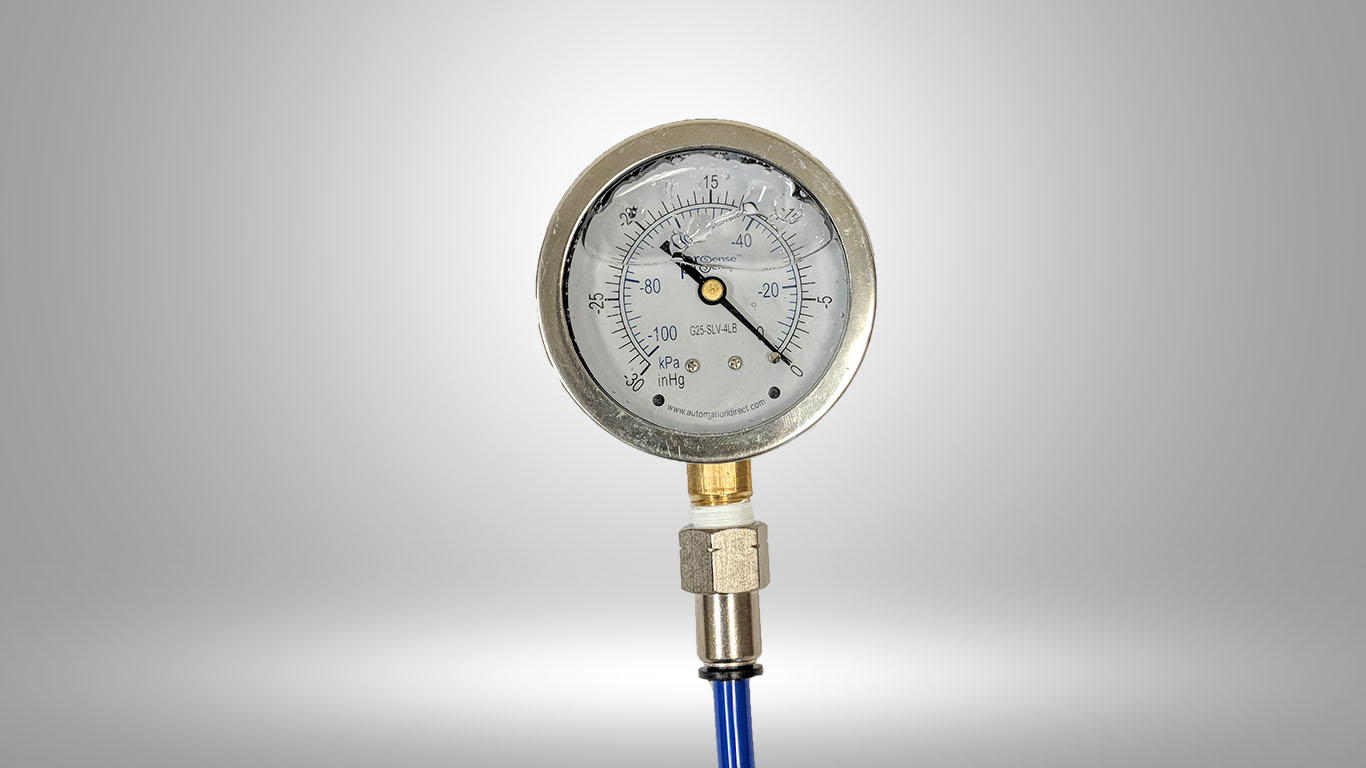
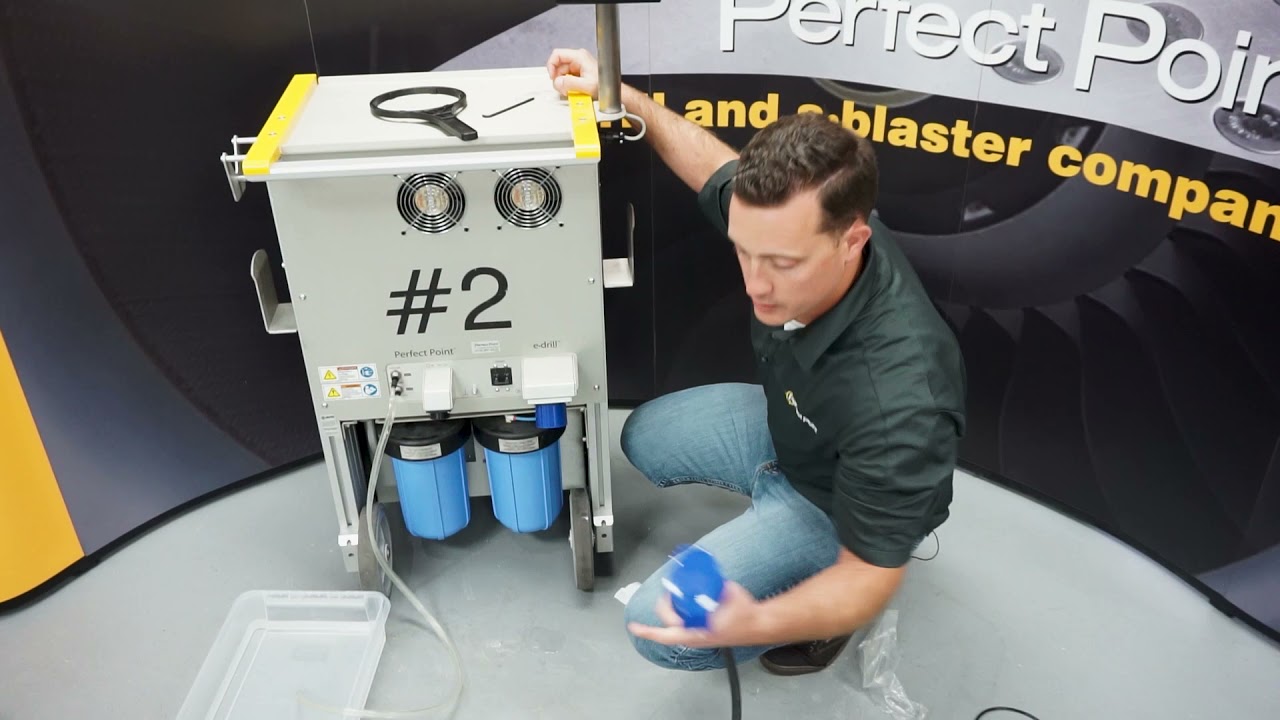
    Checking Vacuum and pressure

    E-Drill 2.0
    The system is provided with Vacuum and Pressure gauges to check the performance of the Dielectric wa...
    The E-Drill system is provided with a maintenance kit which includes a drain bowl and tank wrenches. These tools are used when servicing the tank. Sediment tank cleaning is conducted as follows: Loosen the knob underneath the tank and slide the tank out. Set the drain bowl under the drain cap located towards the bottom…

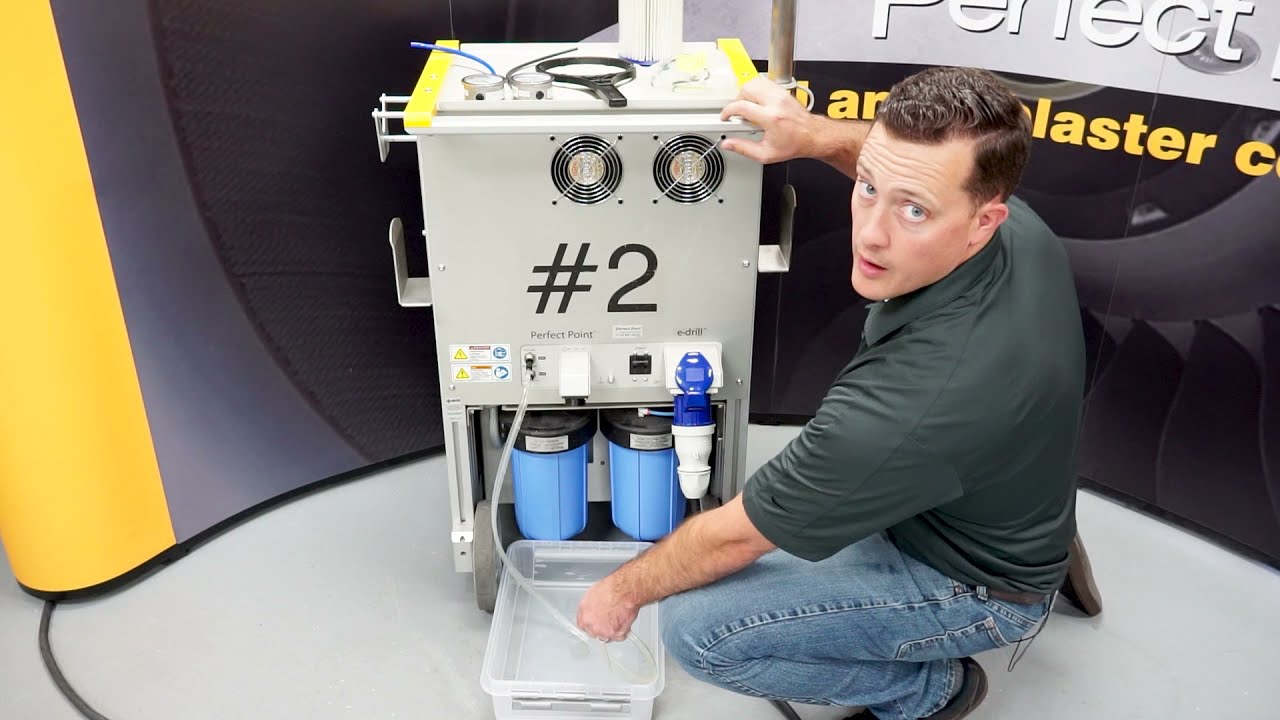
    Empty And Clean Sediment Tank

    E-Drill 2.0
    Sediment tank cleaning is conducted as follows: Loosen the knob underneath the tank and slide the t...
    Follow the previous section to empty the sediment tank and prepare for filter change. It is recommended to change the Deionizing (DI) filter cartridge at the same time as the sediment filter. The DI filter cartridge can be removed and replaced without emptying the tank. The procedure is as follows: Once the tank is empty,…

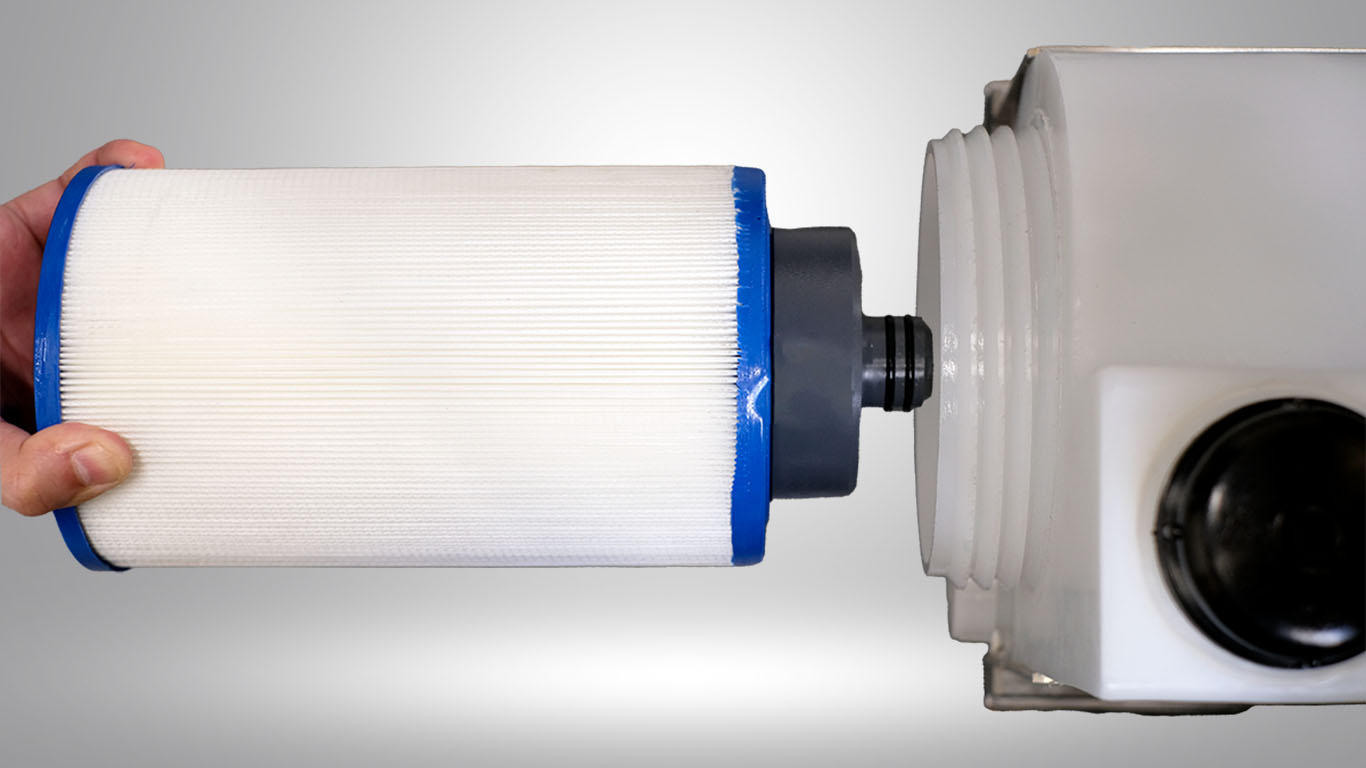
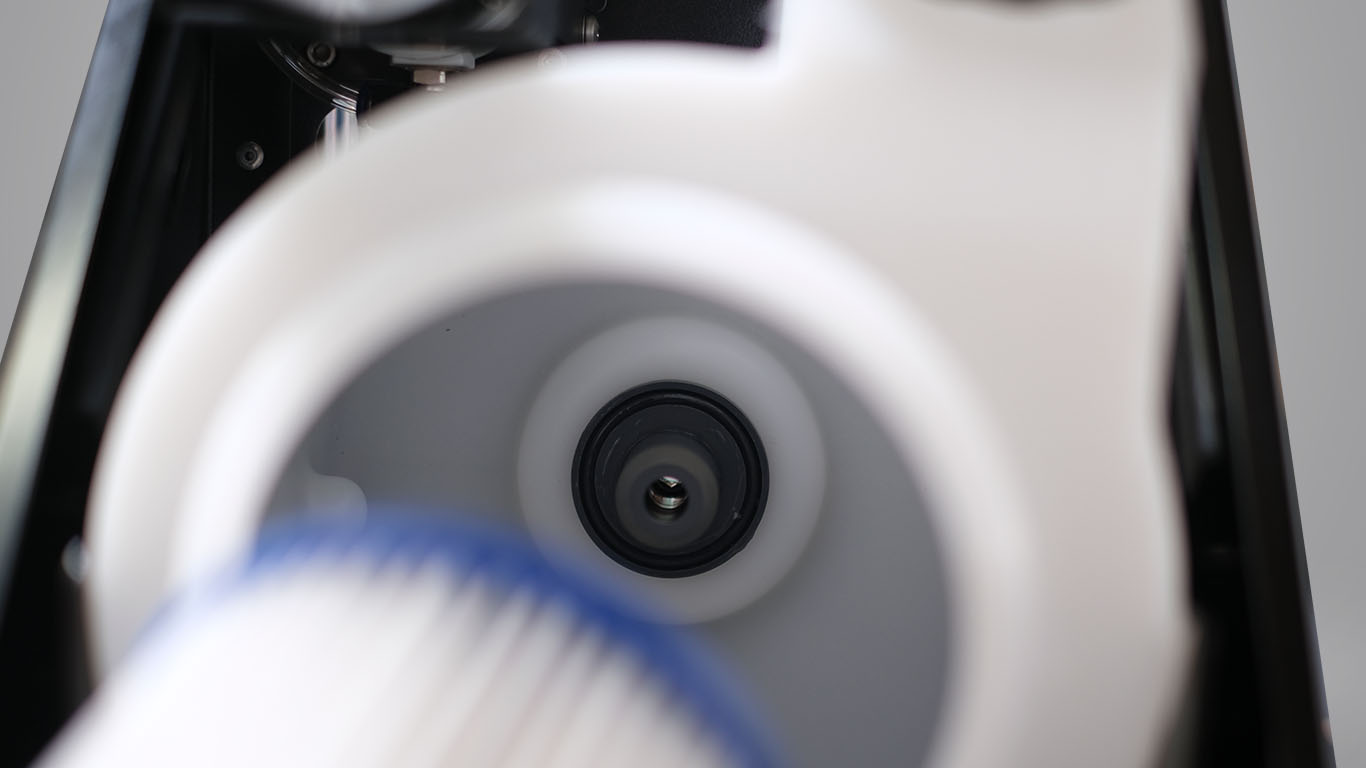
    Replace Filter and Remove Sediment

    E-Drill 2.0
    Once the tank is empty, Use the provided strap wrench to remove the large cap in the center of the t...
    The Status section of the Current Part screen will provide a maintenance warning when 500 cut cycles remain The system will continue to operate, but maintenance is recommended before the next shift. After the warning is activated, the system will count down the final 100 cut cycles before automatically shutting down at the mandatory 5500…

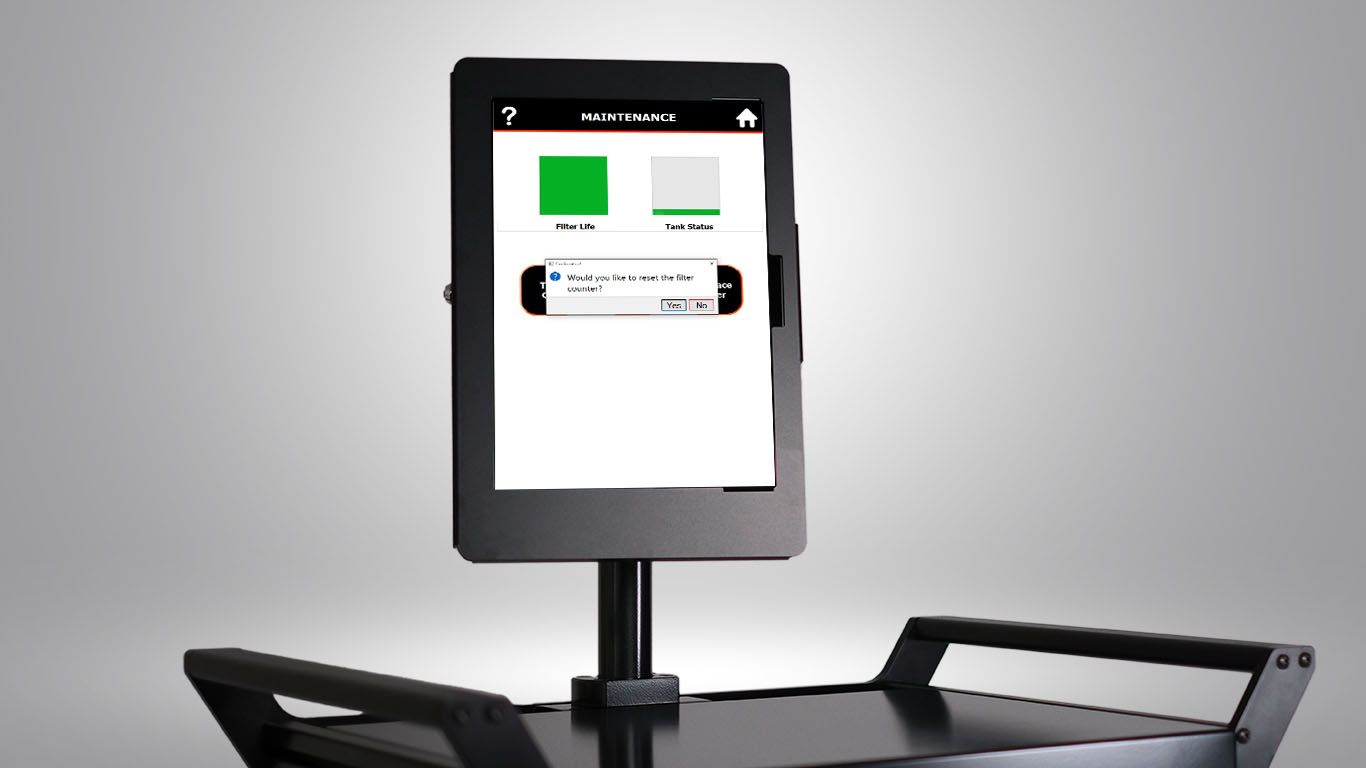
    MSU Maintenance Warnings and service procedures

    E-Drill 2.0
    Status section of the Current Part screen will provide a maintenance warning when 500 cut cycles rem...
    Thanks for joining our new, comprehensive, E-drill Training and Maintenance Course. In this section, we change and adjust the ground pin of the Center Ground(CG) handtool. As always, for most maintenance functions, consult the five-step guide on the lid of your tool-cart and the Maintenance and Troubleshooting Booklet in your maintenance kit in the toolcart.…

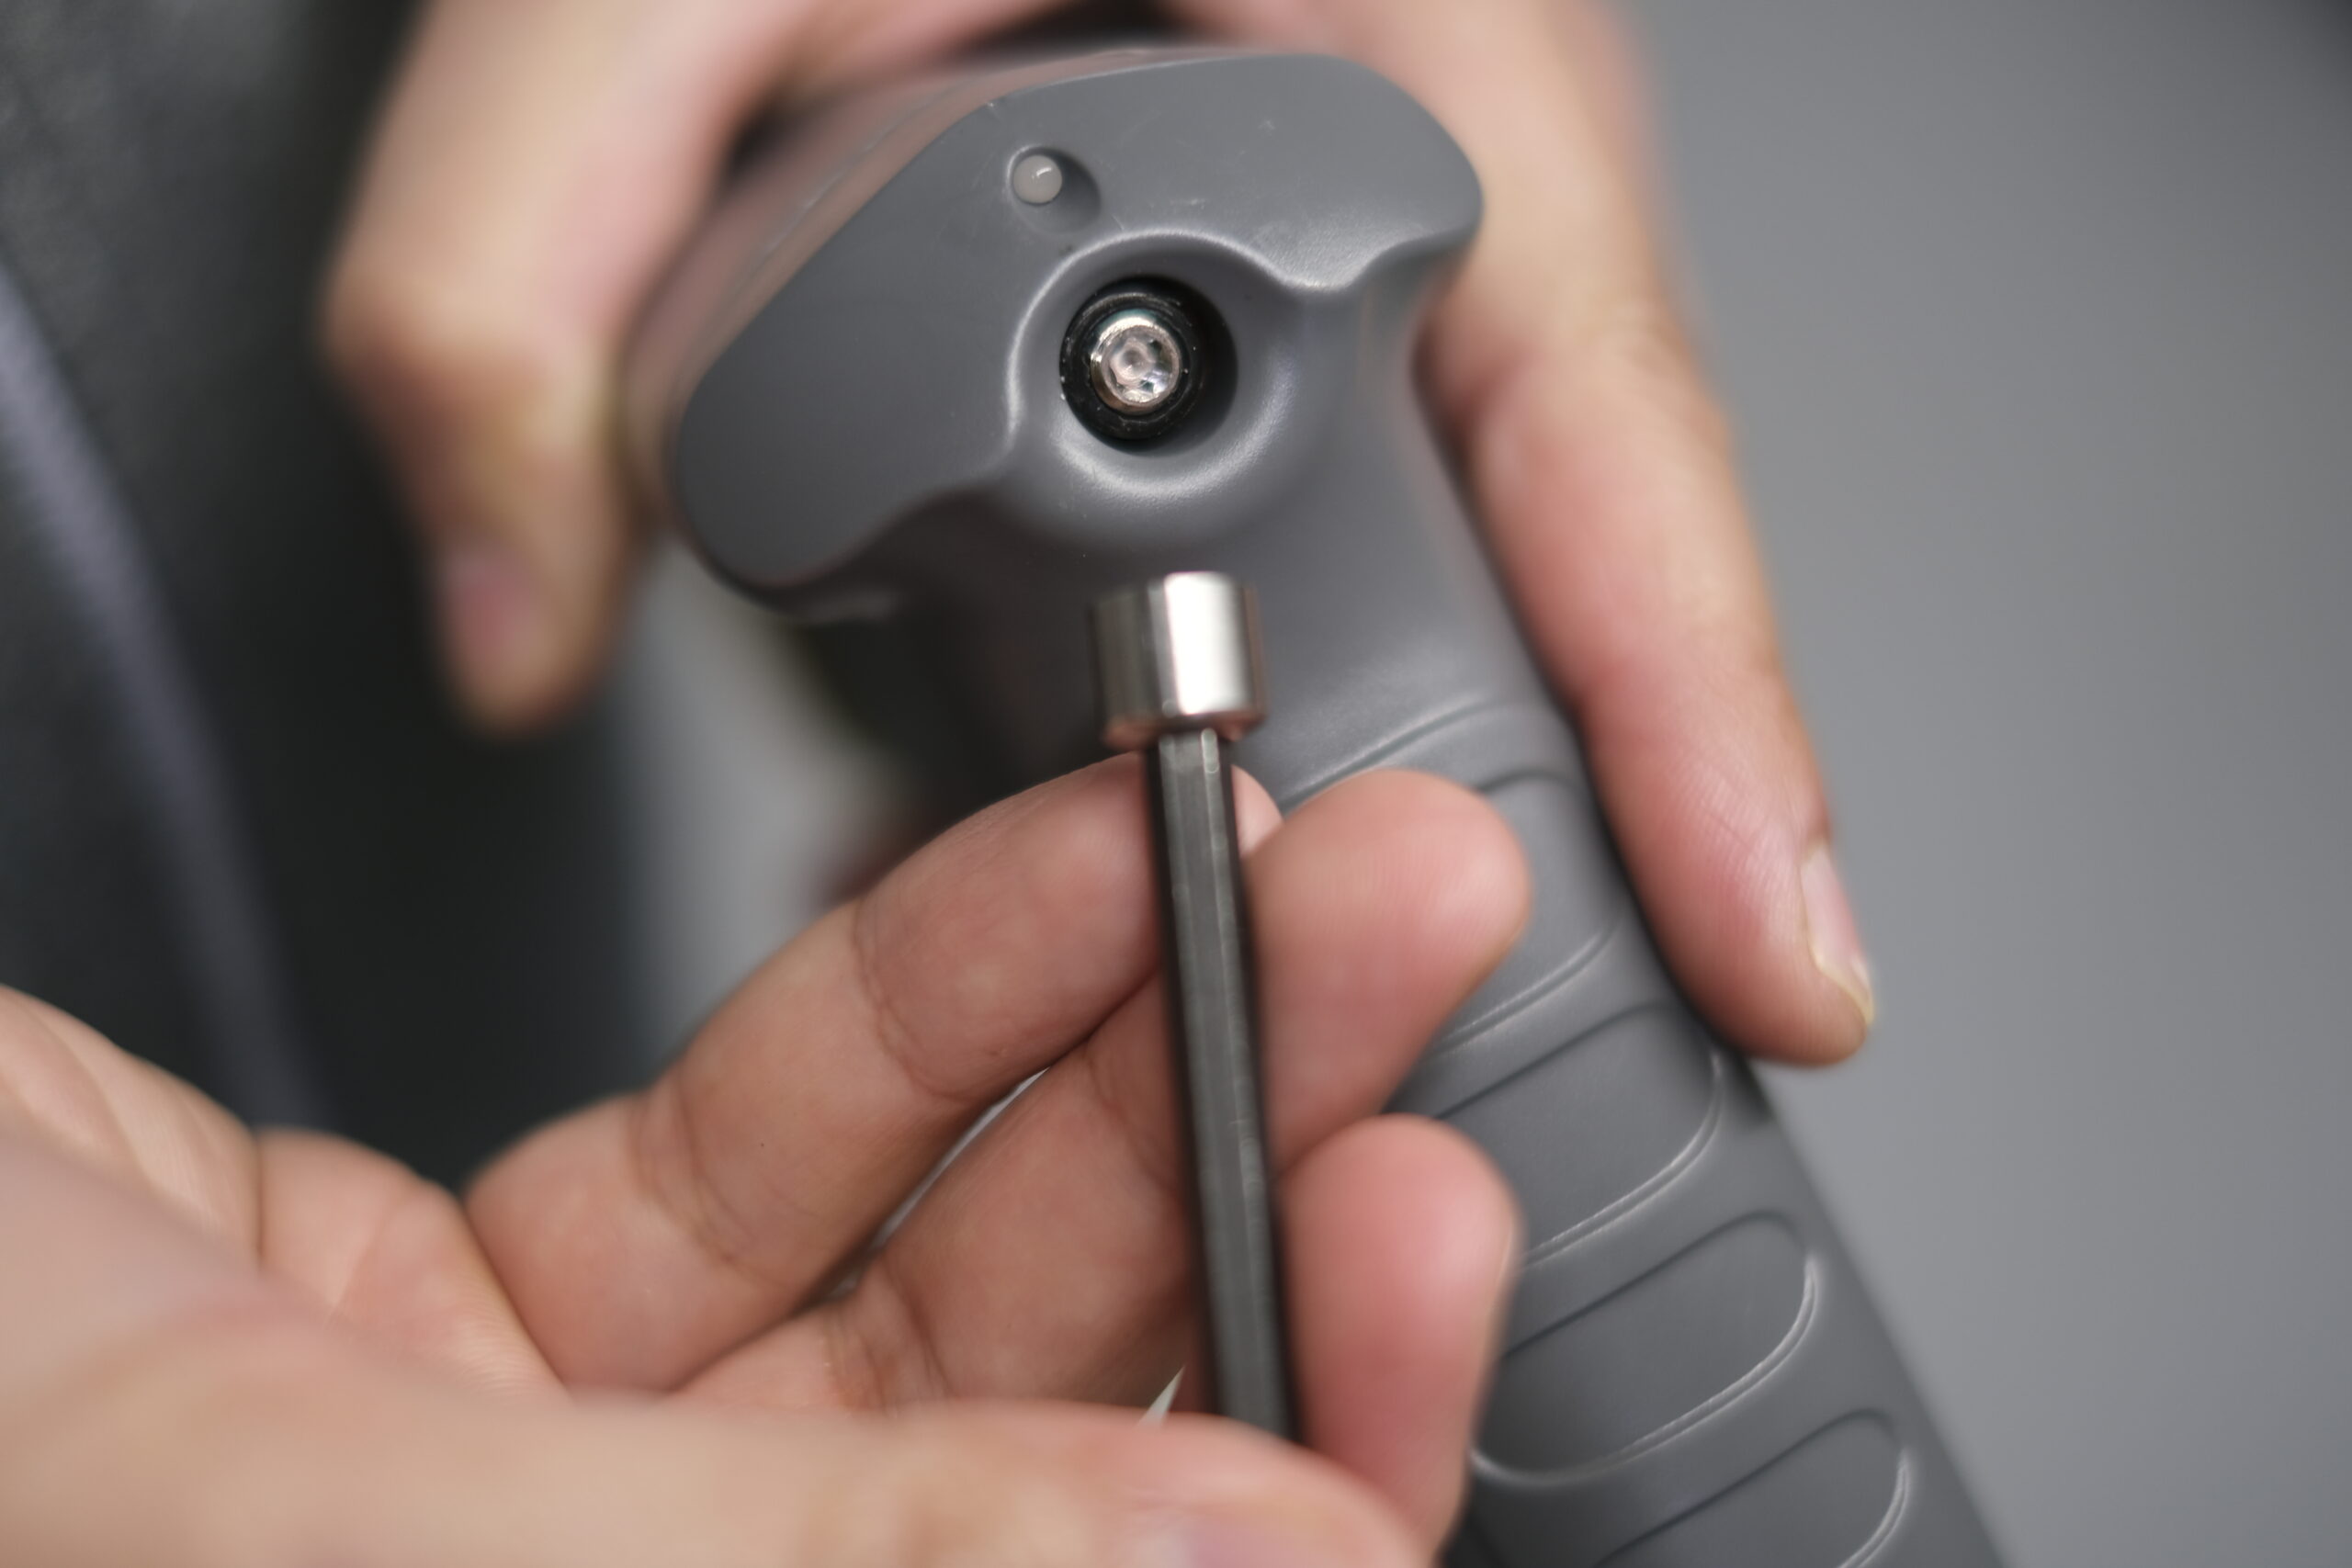
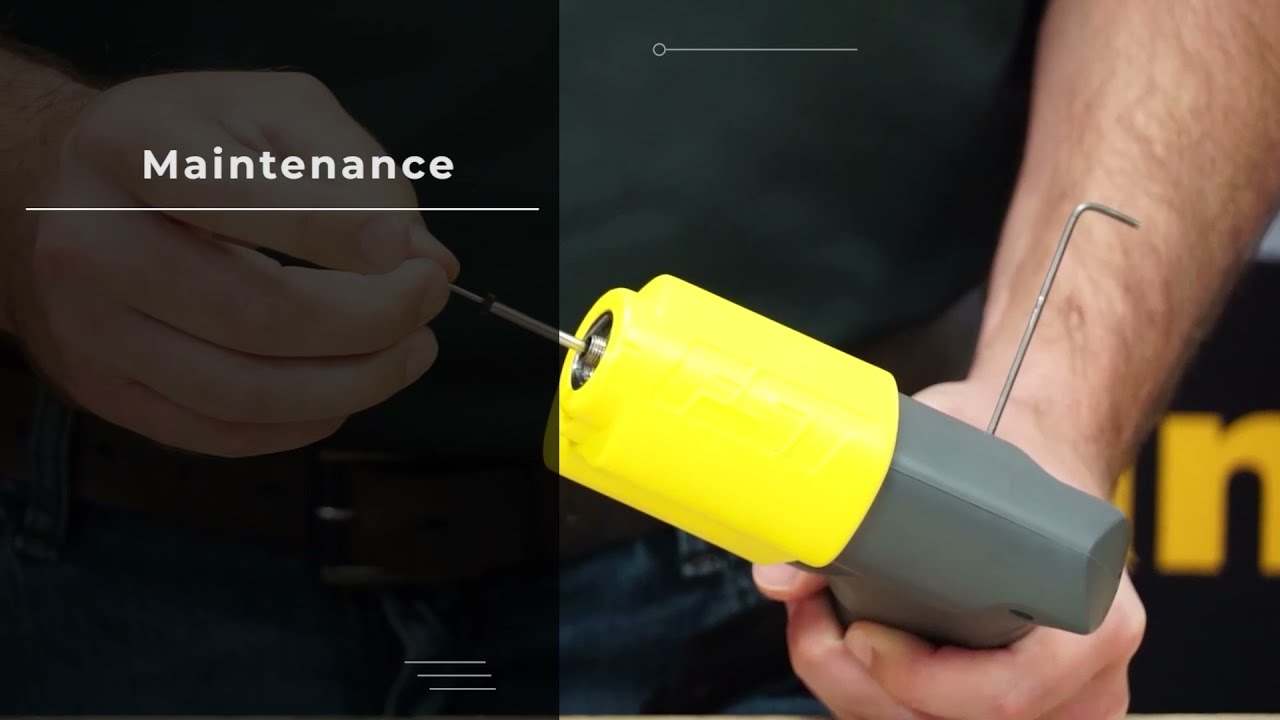
    Changing/Adjusting the Ground Pin

    E-Drill 1.0
    How to change and adjust the ground pin of the Center Ground(CG) handtool for an E-Drill 1.0 Machine...
    Thanks for joining our new, comprehensive, E-drill Training and Maintenance Course. In this section, we perform a bleed and fill. This is performed as a troubleshooting step (if you hear a screeching sound during a cut) and every time after you empty the system. If air is ever introduced to the water system, do a…

    Bleed and Fill (Troubleshooting)

    E-Drill 1.0
    Performing a bleed and fill. This is performed as a troubleshooting step (if you hear a screeching s...
    In this section, we change the MSU filter. This maintenance needs to be performed every 5500 cuts. You will see a 500-cut countdown appear at 5000 cuts(500 cuts left until the system locks). Once the countdown ends the system will remain locked until you run the maintenance and reset the counter. As always, for most…

    Changing the Filter – E-Drill 1.0

    E-Drill 1.0
    This maintenance needs to be performed every 5500 cuts. You will see a 500 cut countdown appear at...
    In this section, we empty the sediment tank. This maintenance needs to be performed every 1500 cuts. You will see a 500 cut countdown appear at 1000 cuts(500 cuts left until the system locks). Once the countdown ends the system will remain locked until you run the maintenance and reset the counter. As always, for…

    Emptying the Sediment Tank – E-Drill 1.0

    E-Drill 1.0
    This maintenance needs to be performed every 1500 cuts. You will see a 500 cut countdown appear at...
    Thanks for joining our new, comprehensive, E-Drill Training and Maintenance Course. In this section, we go over everything included in the E-Drill maintenance kit that you can find in the bottom drawer of your tool cart. As always, for most maintenance functions, consult the five-step guide on the lid of your tool cart and the…

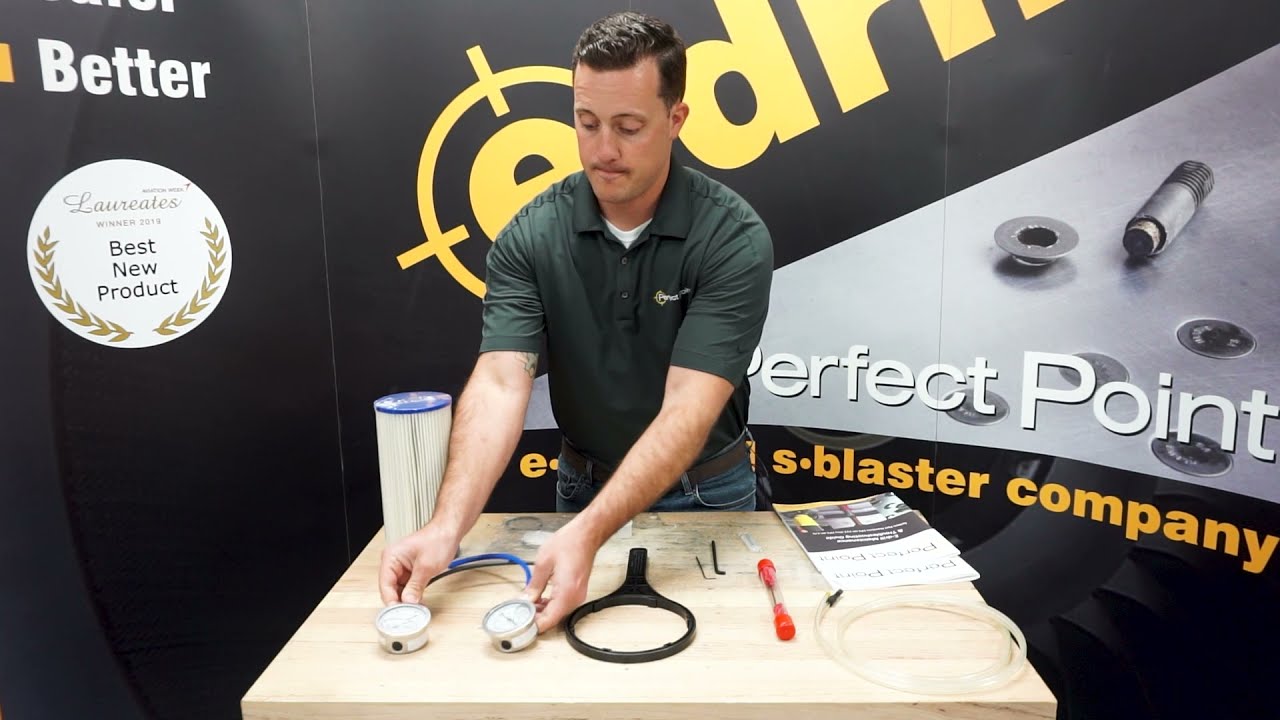
    Unboxing your Maintenance Tool Kit

    E-Drill 1.0
    Everything included in the E-Drill maintenance kit that you can find in the bottom drawer of your to...
    Thanks for joining our new, comprehensive, E-drill Training and Maintenance Course. In this section, we will cover the best practices for your typical End of Day maintenance. You will want to follow these practices each day when you put your tool away to ensure your tools remain in good working order. There is an

    End of Day Maintenance and Removing HandTool

    E-Drill 1.0
    Best practices for your typical End of Day maintenance. You will want to follow these practices each...