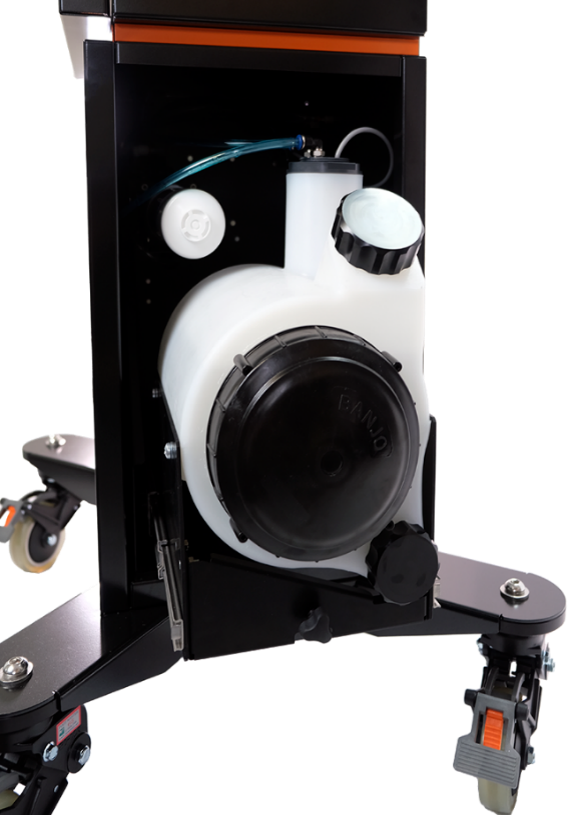
Before changing your filter you must first empty the sediment tank. The E-Drill system comes with a maintenance kit that includes a drain bowl and tank wrenches, which are used for servicing the tank. Follow these steps to clean the sediment tank:
- Loosen the knob underneath the tank and slide the tank drawer out. Position the drain bowl under the drain cap at the bottom of the tank. Remove the cap to empty the tank into the drain bowl.
- Once the tank is empty, use the provided strap wrench to remove the large cap on the side of the tank. Grip and pull out the pleaded sediment filter.
- With the filter removed, keep the drain cap open and rinse the inside of the tank with water to flush out any remaining sediment.
- Dispose of the sediment-laden water according to your facility’s guidelines.
- After cleaning the sediment, you can proceed to replacing the filter.
It is recommended to change the Deionizing (DI) filter cartridge at the same time as the sediment filter. The DI filter cartridge can be removed and replaced without emptying the tank. The procedure is as follows:
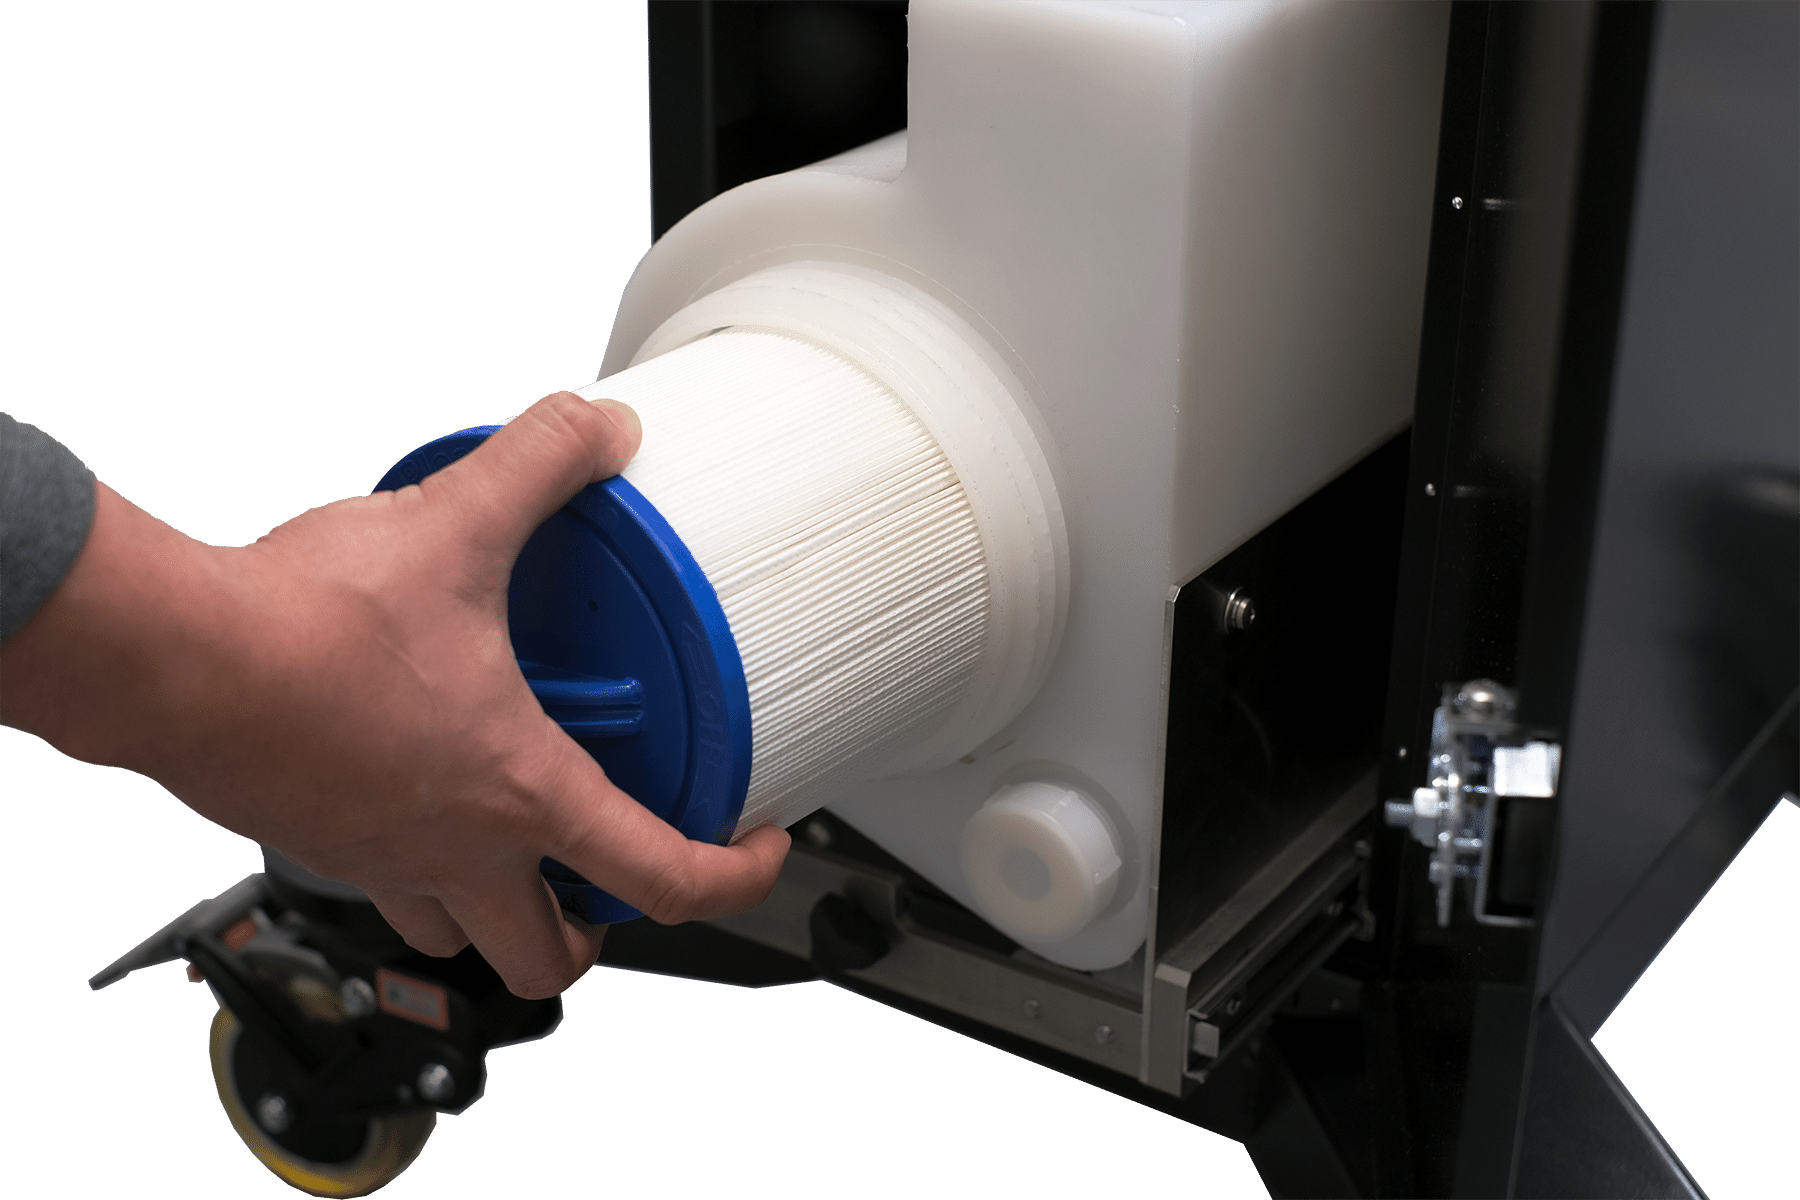 Once the tank is empty, Use the provided strap wrench to remove the large cap in the center of the tank side. Once the cap is removed, pull on the sediment filter to remove the filter.
Once the filter is out, keep the drain cap open and spray the inside of the tank with water to clean and drain out any remaining sediment.
Carefully insert the new filter horizontally until it engages with the filter receptacle inside the tank. Press the filter until it contacts the rear of the tank.
Prior to reassembly, inspect the cap to ensure the seal is clean, properly lubricated and seated. Apply silicone grease to the O-Rings on the end of the filter cap.
It is recommended to replace the DI filter cartridge when replacing the sediment filter. To remove the old filter cartridge simply twist counterclockwise and unthread it from the receptacle. Before installing the new filter, remove any cap, or protective cover from the filter opening, and discard. Thread the new filter cartridge on by twisting clockwise. Ensure it is fully seated before proceeding.
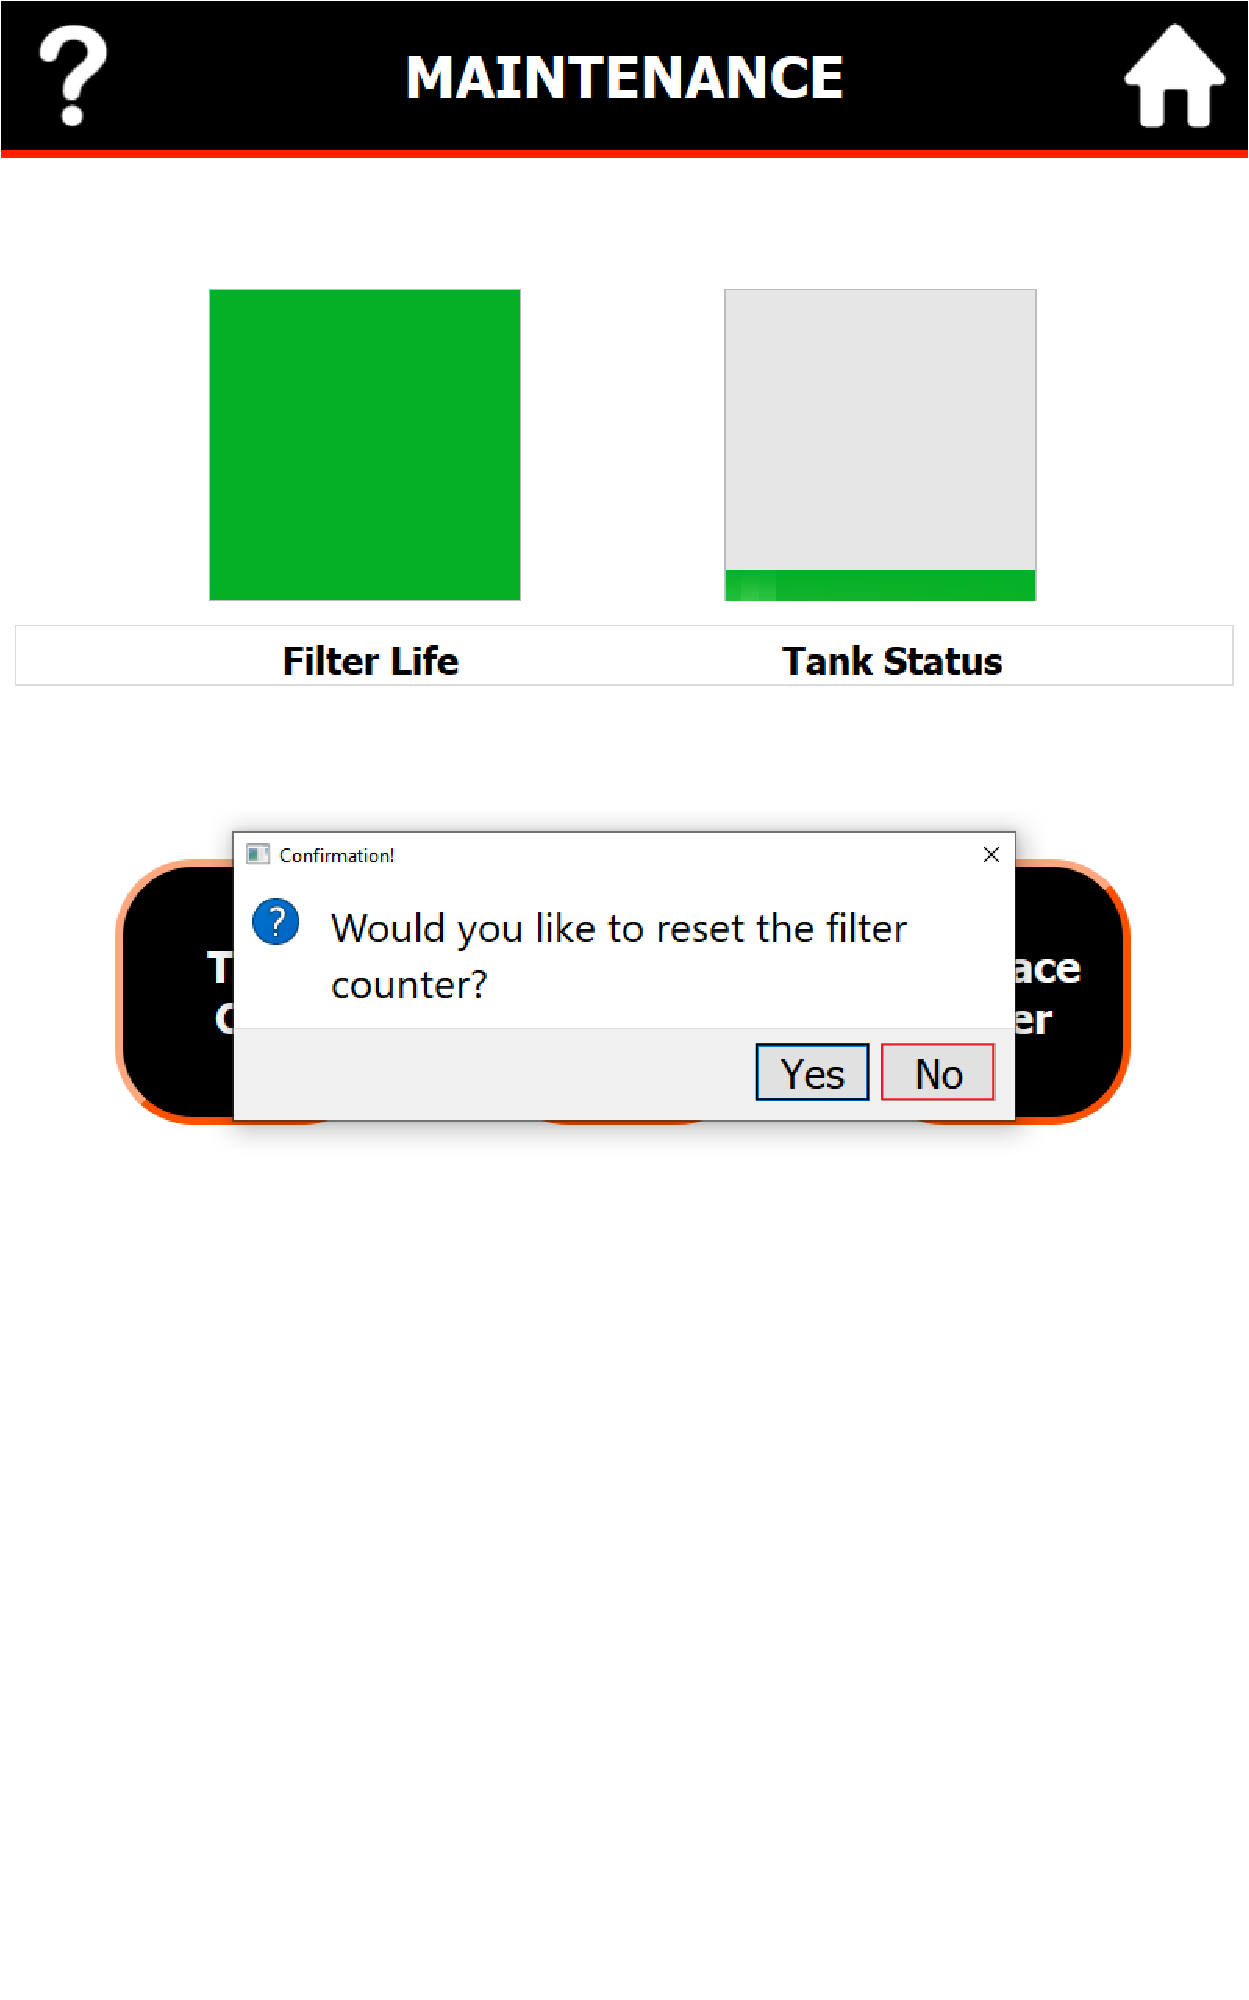 After filter or DI filter cartridge replacement, the system must be completely filled and bled. Follow section 9 for recharge and bleed procedure. The system will prompt to confirm that you are resetting the filter count, select “YES.”