Slow is smooth. Smooth is fast.
Task: Remove 5 fasteners using E-Drill
Scored on: Time + quality + process discipline
Key to winning: Accurate location before cutting
General E-Drill Resources:
- E-Drill Training Videos: https://ppedm.com/support/training-videos/
- Full E-Drill Userguide: https://ppedm.com/support/documentation/
Introduction
 The E-Drill Fastener Removal event, sponsored by Perfect Point, tests a technician’s ability and speed when removing titanium fasteners from an aircraft structure. This is a required process in aircraft lifecycle maintenance, but the industry hasn’t seen significant disruption for the last 50 years. It’s a time-consuming task that, if done improperly, can lead to costly damage.
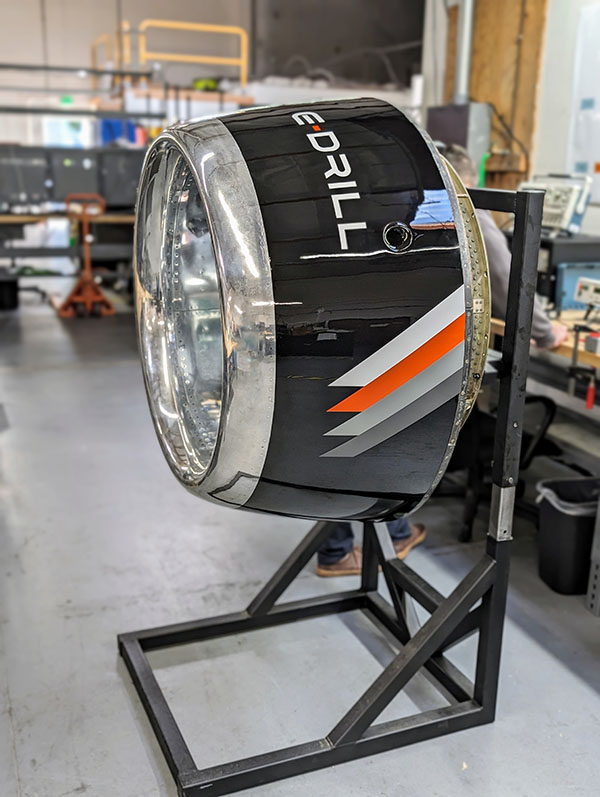
The event requires technicians to each remove five titanium fasteners from a thrust reverser using a Perfect Point E-Drill.
Each competitor will remove one of the industry’s most difficult-to-remove fasteners from a recently refurbished business jet thrust reverser. Typically, an E-Drill is five times faster than traditional methods, far less likely to damage aircraft structures, and is less strenuous on the technician. An E-Drill can cut down fastener removal process time significantly, while reducing FOD and protecting both the worker and the aircraft.
To be successful, teams need a basic understanding of how to use the E-Drill tool. Job cards for both methods will be provided during the preparation time and during the event. Points are accrued for process time, quality and the ability to complete the task.
Supplied Parts List / Description
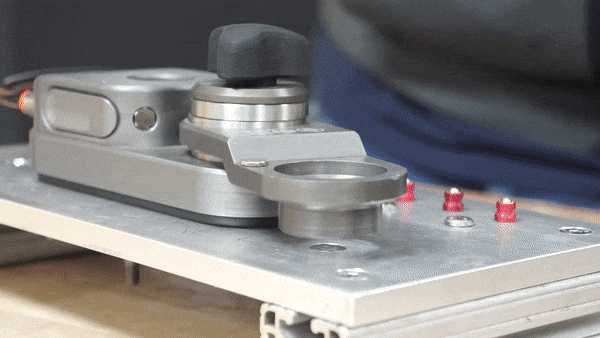
- Offset Vacuum Locator (OVL): The OVL will be used to locate the hand tool concentric with the fastener head prior to removal. There is a vacuum relief valve on the right-hand side that is used to move and engage the OVL to the work piece – push to relieve the vacuum, release to engage.
- Bombsight: The Bombsight will be used to ensure concentricity is established before using E-Drill. Place Bombsight into OVL, release the vacuum on the OVL, and align it to the fastener head using the optical aperture.
- E-Drill hand tool: Used to cut the head of the selected fastener when fitted with the correct electrode, adapter, and guide. These will be provided and properly installed for the contestant.
- Air Punch: Designed to fit into the groove left by the electrode and to punch the fastener out. Insert into the cut groove, and pull the trigger a single time to punch the fastener and sever the head from the stem.
Fastener Removal Instructions
(Locate → Cut → Repeat → Punch → FOD → Done)
- Identify the Qty. (5) Titanium Hi-Loks to be removed from work-piece
- Judges will pre-mark work area

- Judges will pre-mark work area
- LOCATE: Using the Offset Vacuum Locator and Bombsight(s), locate the tooling over the first fastener head. (See Figure 1 & 2)
- Place tool over the fastener and allow vacuum pressure to lock tool to work piece
- Insert Visual Bombsight into the open end of the locator and precisely align the fixture over the fastener head.
- Depress the vacuum release lever on the side of the tool base to release vacuum and allow for precise movement of the fixture.
- Align the aperture to show the entire circumference of the fastener head. This will ensure concentricity over the fastener. (See Figure 2)
- Note- Take extra time to ensure proper alignment. Misaligned cuts may take longer and may not punch out. If this happens you will need to repeat the cutting process and waste time. Significant misalignment can lead to damaging the competition part. If damage occurs you will be penalized
- Once aligned remove visual bombsight.
- DO NOT RUSH THE LOCATION STEP as it will lead to misalignments and therefore penalties to your score. See final note for information. On the other hand, we will give slight bonuses for cuts that are extremely accurate, less than 1 thou off-center, so take your time.

|
|
|

- CUT: Insert E-Drill Hand-Tool into OVL Fixture and Cut Fastener
- Press down E-Drill with firm force into the locator
- Note- Only light amount of force is required. Just enough to seal the O-ring at the nose of the hand tool, as well as compressing the light spring on the grounding pin.
- Execute Cut Sequenc: Squeeze and hold trigger until Green light on back of Hand-Tool illuminates.
- Place E-Drill Back into handtool stand
- Press down E-Drill with firm force into the locator
- REPEAT: Repeat steps 2 and 3 until All fasteners are cut
- Replace Hand-Tool into the Hand-Tool Stand before continuing to punch out.
- PUNCH: Using the Single Shot Air Punch, Align the Air punch nose adapter into the Cut Ring on the fastener.
- Once aligned, pull trigger while pushing down on the tool. Note: If fastener does not separate after, try punching one or two more times. If it still does not punch, move on to punching the rest of the fasteners. You will need to re-locate E-Drill and re-cut the fastener. (steps 2-6)
- Repeat the punch step for all fasteners.
- FOD: Collect fastener heads/FOD and place in FOD Tray.
- Notify the judge that you are DONE!
Accuracy Note: Cuts will be inspected for concentricity. Time penalties may be assessed for off-center cuts that risk breakthrough or damage to the test article. Minor bonuses may be awarded for highly accurate, centered cuts.

The video at the bottom of the page shows the full process on multiple fasteners.
Post Removal
- When finished, ensure all fastener heads are discarded in the supplied containment tray.
- Wipe away any excess water.
- Restore all tooling to start position
- Audibly confirm that you have completed the competition task
Score Card
We will be using the official AMC score card to judge this event. Description of penalties are below:
- Any displays of unprofessional behavior
- Improper use of tooling or equipment
- Improper storage of tooling during and after event
- Causing damage to test article or tooling
- Removing unassigned fasteners
- Failure to clean up prior to saying “done” (leaving FOD, gear adrift, etc)
